
Sturdy workbench construction
Constructing a sturdy workbench requires careful planning and execution. Below is a step-by-step guide to help you build a robust workbench:
**Tools and Materials:**
Before you begin, gather all the necessary tools and materials. Here's a general list to get you started:
Tools:
- Measuring tape
- Pencil
- Circular saw or handsaw
- Power drill
- Screwdriver (or drill bits)
- Hammer
- Clamps
- Level
Materials:
- 2x4 lumber (for the frame)
- 3/4-inch plywood or MDF (for the top)
- 1/2-inch plywood (for the shelf, optional)
- Wood screws
- Wood glue
- Sandpaper
- Varnish or paint (optional)
**Step 1: Design the Workbench**
Decide on the dimensions of your workbench based on your needs and available space. A typical workbench height is around 34 to 36 inches, but adjust it according to your preference and comfort. Sketch out the design on paper, including the frame, top, and any additional features like shelves or drawers.
**Step 2: Cut the Lumber**
Using the circular saw or handsaw, cut the 2x4 lumber to the required lengths according to your design. You'll need four legs, horizontal beams for the top and bottom, and additional cross supports for stability.
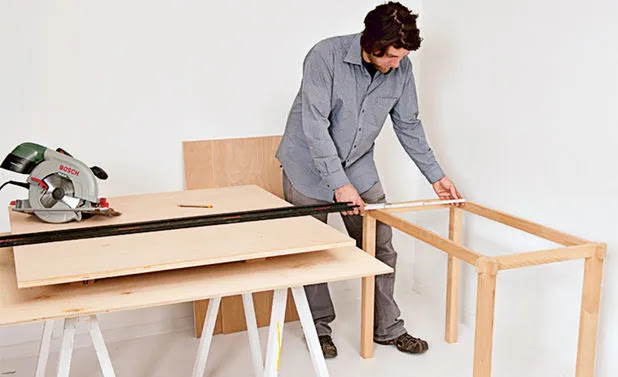
**Step 3: Assemble the Frame**
Start by building the frame of the workbench. Attach the horizontal beams between the legs using wood screws and wood glue. Use clamps and a level to ensure the frame is square and stable.
**Step 4: Add Cross Supports**
To further strengthen the frame, add cross supports between the horizontal beams. These will help distribute the weight evenly and prevent the workbench from wobbling.
**Step 5: Attach the Top**
Place the plywood or MDF board on top of the frame. You can secure it in place using wood screws from underneath. For added stability, you can also apply wood glue before attaching the top.
**Step 6: Optional Shelf**
If you want a shelf for additional storage, cut the 1/2-inch plywood to size and attach it between the legs or cross supports. This shelf can be used to store tools, materials, or other equipment.
**Step 7: Sand and Finish**
Smooth out any rough edges and surfaces using sandpaper. If you prefer, you can apply varnish or paint to protect the wood and give your workbench a more polished look.
**Step 8: Test and Adjust**
Before you start using the workbench, test its stability by placing some weight on top. Make any necessary adjustments to ensure it's sturdy and level.
**Step 9: Organize Your Workbench**
Once your workbench is complete and stable, organize your tools and materials for easy access while working on various projects.
Remember, the above steps are a general guideline, and you can customize the workbench to suit your specific needs and preferences. Always prioritize safety and use appropriate safety gear while working with tools and equipment.
Click here👇